How to set up your environment for iOS Hacking
Learn the basic steps and tools to set up your environment for iOS hacking. Based on practical knowledge acquired through MobileHackingLab.
Based on practical knowledge from Mobile Hacking Lab challenges. link
Table of Contents
- iOS Testing Setup
- Interacting with iOS Devices
- Intercepting Network Traffic
- Dynamic Instrumentation
- Static Instrumentation
iOS Testing Setup
Hardware Requirements
Mac Computer
- Essential for running macOS, the required environment for iOS development and testing.
iOS Device
- A physical device, preferably jailbroken.
Hardware / OS Alternatives
Docker-OSX
- Run macOS in docker without Mac hardware. Our tutorial here
- Xcode with iOS Simulator.
Linux or Windows
- Without Xcode and with other cross-platform tools.
Corellium
- Cloud-based virtualized iOS devices for testing.
- Run and debug apps, simulate different device models, and perform security testing.
Software Setup
Software Setup (1/3)
Xcode
- IDE with additional tools.
- iOS Simulator.
Homebrew
- A package manager for macOS.
libimobiledevice Link
- A cross-platform library that allows interaction with iOS devices without needing iTunes, useful for debugging and device management tasks.
Frida and Objection
- Dynamic instrumentation and runtime exploration.
Software Setup (2/3)
Proxy (Burp Suite / Caido / ...)
- To intercept and analyze HTTP/HTTPS traffic.
Wireshark / TCPDump
- Network protocol analysis.
MobSF
- For automated static and dynamic analysis.
Software Setup (3/3)
Ghidra
- Used to statically analyze binaries, decompile machine code back into a high-level language.
ipsw
- The Swiss Army Knife for iOS (and macOS) research.
Radare2
- A powerful reverse engineering framework for dynamically analyzing binary files.
iaito
- The official graphical interface of Radare2.
iOS Device Setup
iOS Physical Device Setup
Use an (old) iPhone. I use iPhone 8 Plus btw.
Jailbreak
- Tethered
- Semi-Tethered
- Untethered
- Semi-untethered theapplewiki.com/Jailbreak CanIJailbreak.com
Sideloading
- Install apps without app store
- Package manager: Sileo, Cydia
- Trollstore
Preparing the Device
- Factory Reset: Begin with a clean device by performing a factory reset. Navigate to Settings > General > Reset > Erase All Content and Settings.
- Enable Developer Mode: Activate developer mode to access development tools. Go to Settings > Privacy & Security > Developer Mode. Approval and a device restart are required.
- Disable Lock Screen and Passcode: To simplify frequent access during testing, disable any lock screen and passcode.
Jailbreak the iOS Device
Step 1: Choose a Jailbreak Method
Select the appropriate jailbreak tool according to your iOS version and iPhone chipset. Visit theapplewiki.com/wiki/Jailbreak to check tool compatibility.
Popular jailbreak tools:
- Dopamine (iOS 15–16)
- palera1n (iOS 15–17)
- Checkra1n (iOS 12–14)
Step 2: Install Cydia or Sileo
Use a package manager to install jailbreak tweaks and utilities.
Step 3: Install Security Testing Tools on Jailbroken Device
- Frida, SSL Kill Switch, Cycript or Radare2
- Tools like Filza for file system exploration
iOS Simulator Device Setup
Simulator
- Use the iOS Simulator for testing various virtual device environments within Xcode, though it has limitations in hardware-specific features.
Corellium Device Setup
Access
- Root or jailbreak devices instantly, no need to add code or use security vulnerabilities.
Control
- Configure device inputs, identifiers, sensors, location and environment.
X-Ray Vision
- OS, app, file and system call analytics and control.
Introspection
- Low-level kernel debugging and boot control.
Network Analysis
- Traffic inspection, tracing and logging.
Replication
- Snapshot, clone, and share devices.
Teaming
- Easy project workspace management and team collaboration.
Tooling
- Simple connection of your favorite tools and systems.
Interacting with iOS Devices
- SSH
- USB
- Use iproxy to convert SSH to USB on jailbroken device
- Use USBFlux on virtual device
- libimobiledevice / libimobiledevice Binaries
SSH
On the iPhone, install OpenSSH Server and NewTerm 2 through Sileo or Zebra.
In the Palera1n app, you can change your sudo password. After changing the sudo password, set up a new password for the root user in NewTerm 2 using:
sudo su
passwd
To update and install packages, use apt. For example:
apt update
apt upgrade
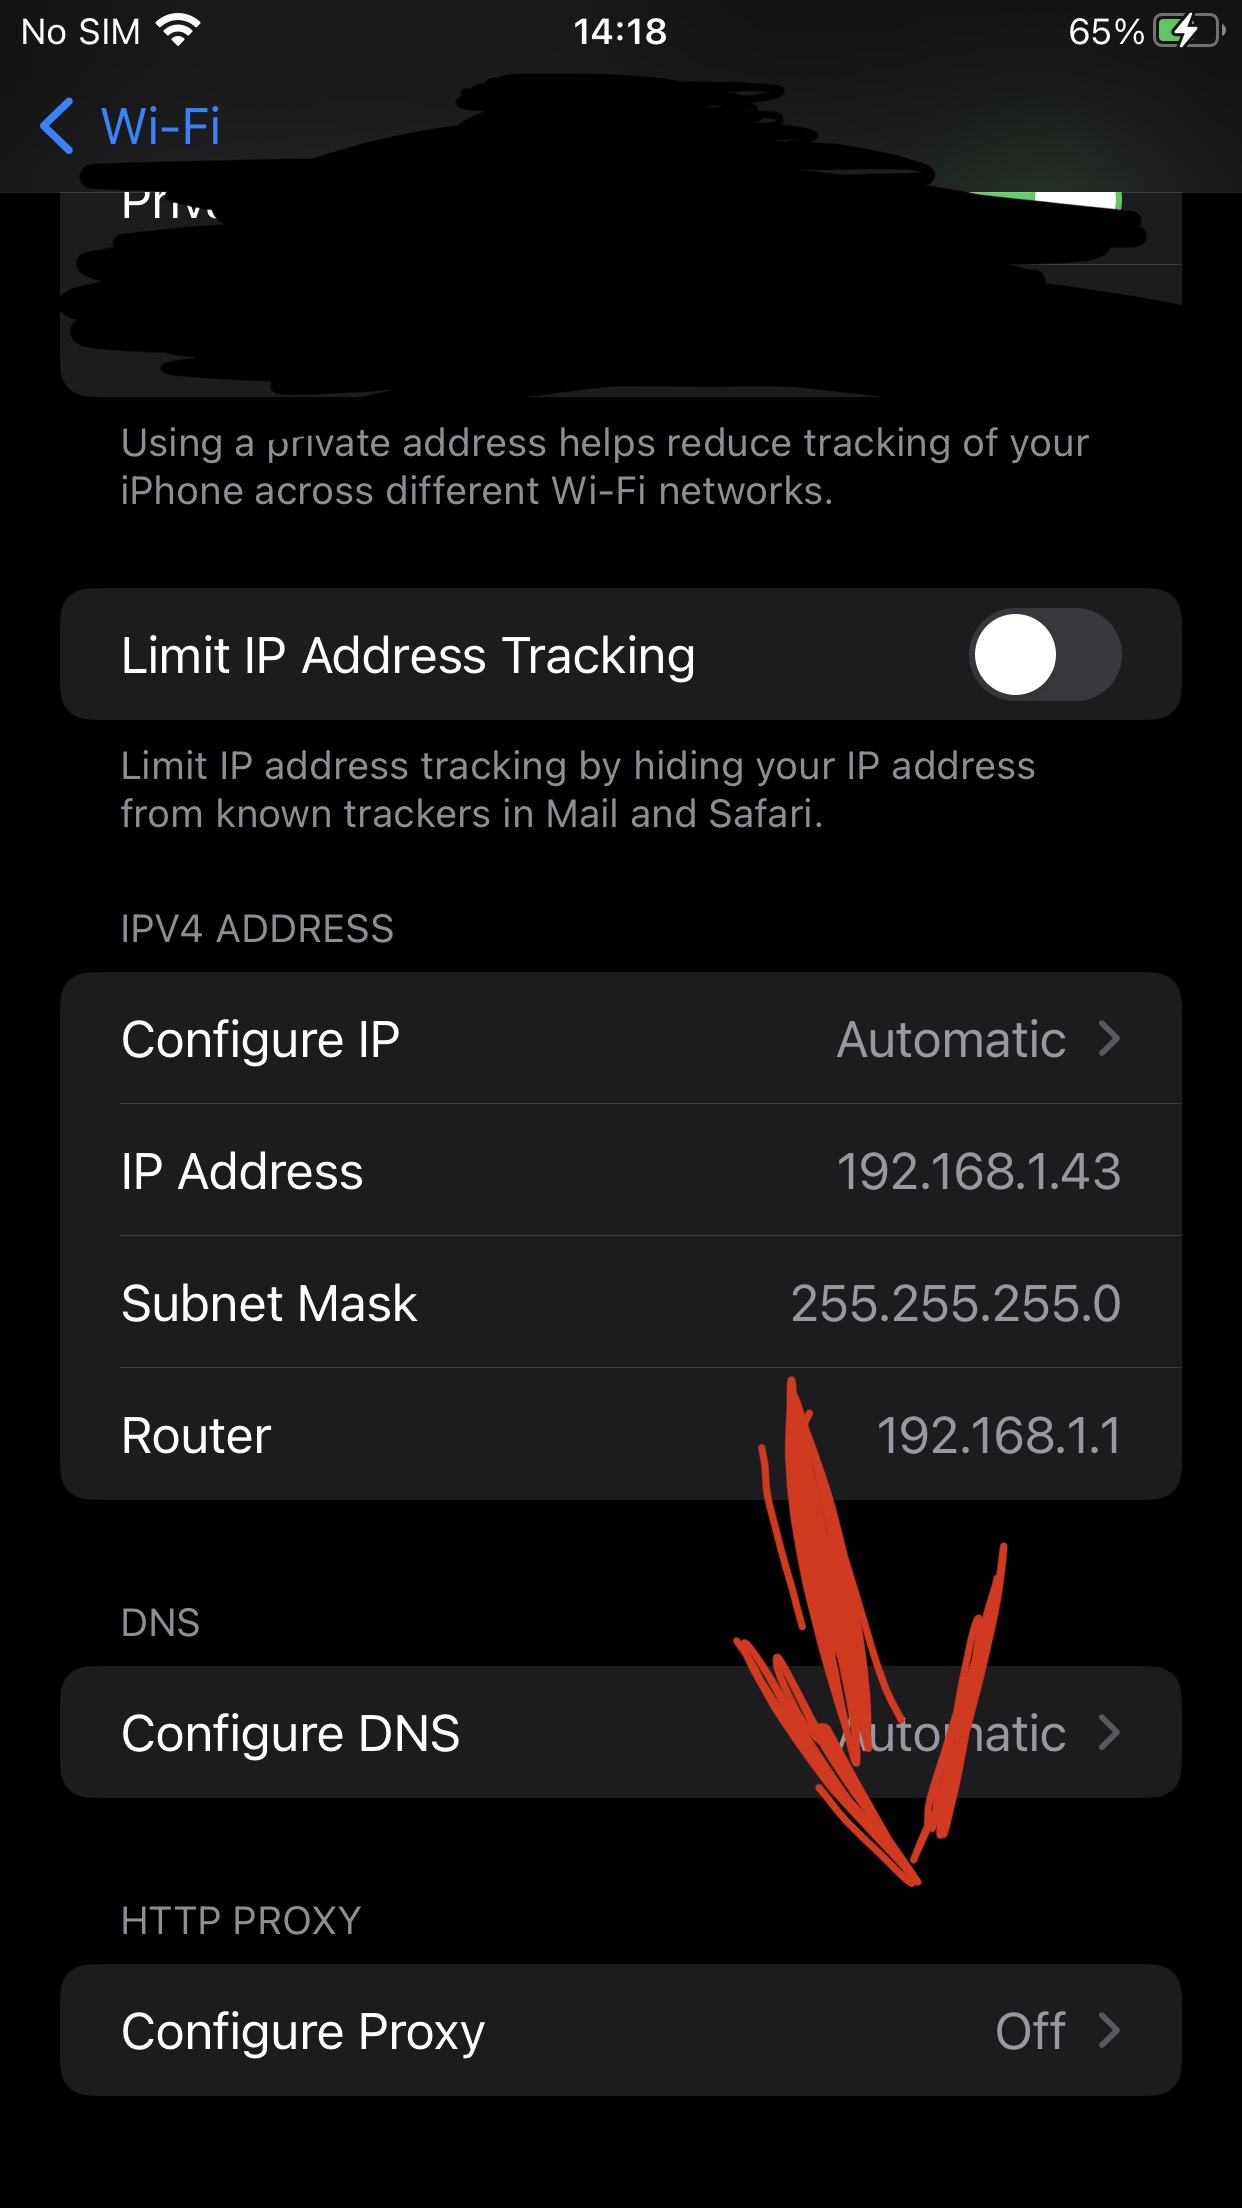
To get your IP address, you need to install the network commands package first:
apt install net-tools
ifconfig | grep 192.168.1
Example output:
iPhone:~ root# ifconfig | grep 192.168.1
        inet 192.168.1.43 netmask 0xffffff00 broadcast 192.168.1.255
iPhone:~ root#
Now from your PC, you can connect via SSH using:
ssh root@<ip>
USB
iproxy
- "iproxy" creates a local port on your computer that forwards to a specific port on your iOS device, typically used to access services like SSH over USB.
- This command forwards local port 2222 to port 22 (SSH) on the device:
iproxy 2222 22
Connect via SSH
- Now, connect to your device over the forwarded port:
ssh mobile@127.0.0.1 -p 2222
Use USBFlux with virtual device
libimobiledevice
- A cross-platform software library that enables interaction with iOS devices without requiring iTunes or any Apple proprietary software.
- Supports various functions like device information retrieval, backup, debugging and more.
Follow the instructions on https://libimobiledevice.org/#get-started to install the toolset, which are in short:
macOS
brew install libimobiledevice
Interaction via SSH + libimobiledevice
https://www.mobilehackinglab.com/course/free-ios-application-security-course
Prerequisites
- A Jailbroken iOS Device: SSH access requires a jailbroken iOS device
- Network access: Both your iOS device and the computer should be on the same network, via VPN (for a virtual device) or Wi-Fi (for a physical device)
- USB device access, as explained in the device setup sections
- libimobiledevice tools: Install libimobiledevice on your host machine
- Target App: The DVIA-v2 app is recommended. Download it from the GitHub repository prateek147/DVIA-v2
Common SSH and libimobiledevice Commands for iOS
Find the application bundle directory of all (user) installed apps:
find /private/var/containers/Bundle/Application/ -name "*.app"
Copy files from the device to your computer:
scp root@<ip>:/etc/master.passwd ~/Downloads/
Upload files to the iOS device:
scp ./payload.txt root@<ip>:/var/mobile/Documents
Using libimobiledevice Tools:
ideviceinfo: Retrieve Device informationideviceinstaller: Install or Uninstall appsidevicebackup2: Create backup of the iOS Deviceidevicesyslog: View iOS System Logsidevicecrashreport: Retrieve Crash Reports
# This command fetches detailed information about the iOS device, such as hardware details and the iOS version.
ideviceinfo

# List installed apps
ideviceinstaller --list-apps

# Install and Uninstall apps
ideviceinstaller --install ./DVIA-v2.ipa
ideviceinstaller --uninstall com.highaltitudehacks.DVIAswiftv2

# Use this tool to back up or restore your iOS device
# Create a full backup (with encryption enabled)
idevicebackup2 encryption on "[PASSWORD]"
idevicebackup2 backup --full ~/Backups/
# Restore a Backup
idevicebackup2 restore \
  --system \
  --settings \
  --password "[PASSWORD]" \
  ~/Backups/
# View backup information
idevicebackup2 info ~/Backups/

# Stream system logs in real-time for monitoring or debugging app behavior
idevicesyslog

# Download crash reports for detailed app crash analysis
idevicecrashreport --keep ~/Reports/
Automating Tasks with SSH and libimobiledevice
https://www.mobilehackinglab.com/course/free-ios-application-security-course
Example: Backup and Data Extraction Script
#!/bin/bash

BACKUP_PATH="$HOME/Device/Backups/"
EXTRACT_PATH="$HOME/Device/Data/"
APP_UID="5CAF9854-AE84-4ABB-A856-5DE570E96171"

# Create a backup
echo "Creating backup..."
idevicebackup2 backup "$BACKUP_PATH"

# Extract data from app directory
echo "Extracting data from app ($APP_UID)..."
scp -r root@10.11.1.1:/var/mobile/Containers/Data/Application/$APP_UID/ "$EXTRACT_PATH"
This script automates the backup process and pulls app data for analysis.
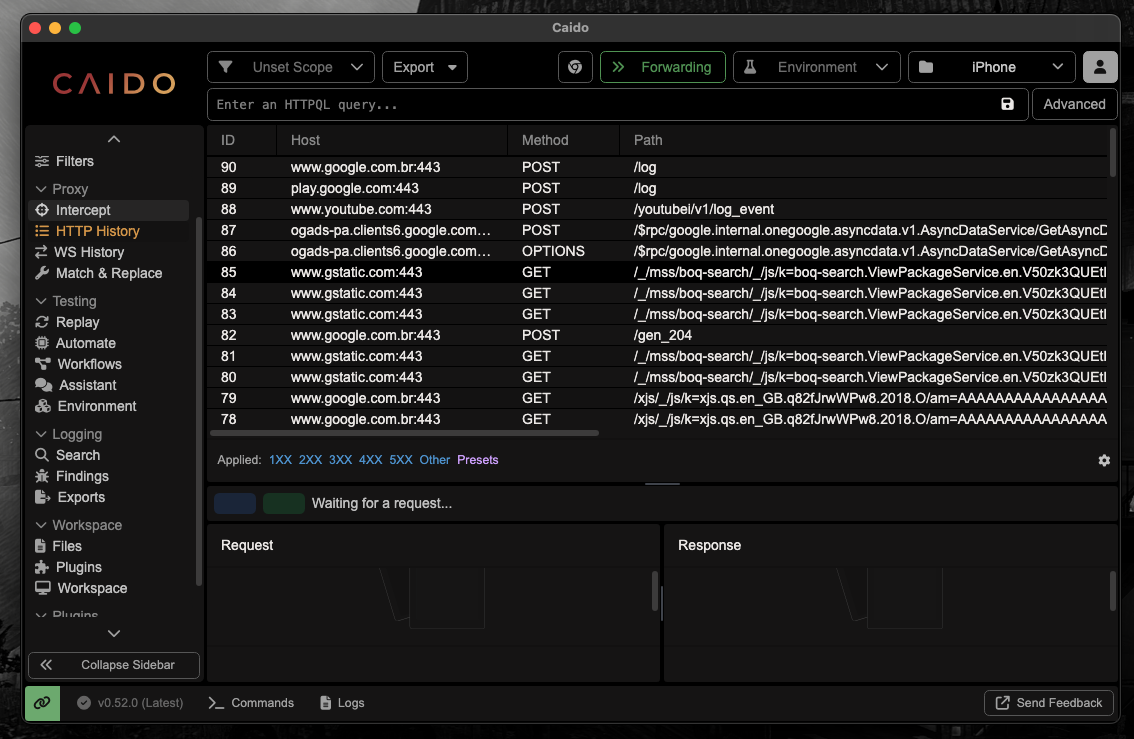
Intercepting Network Traffic
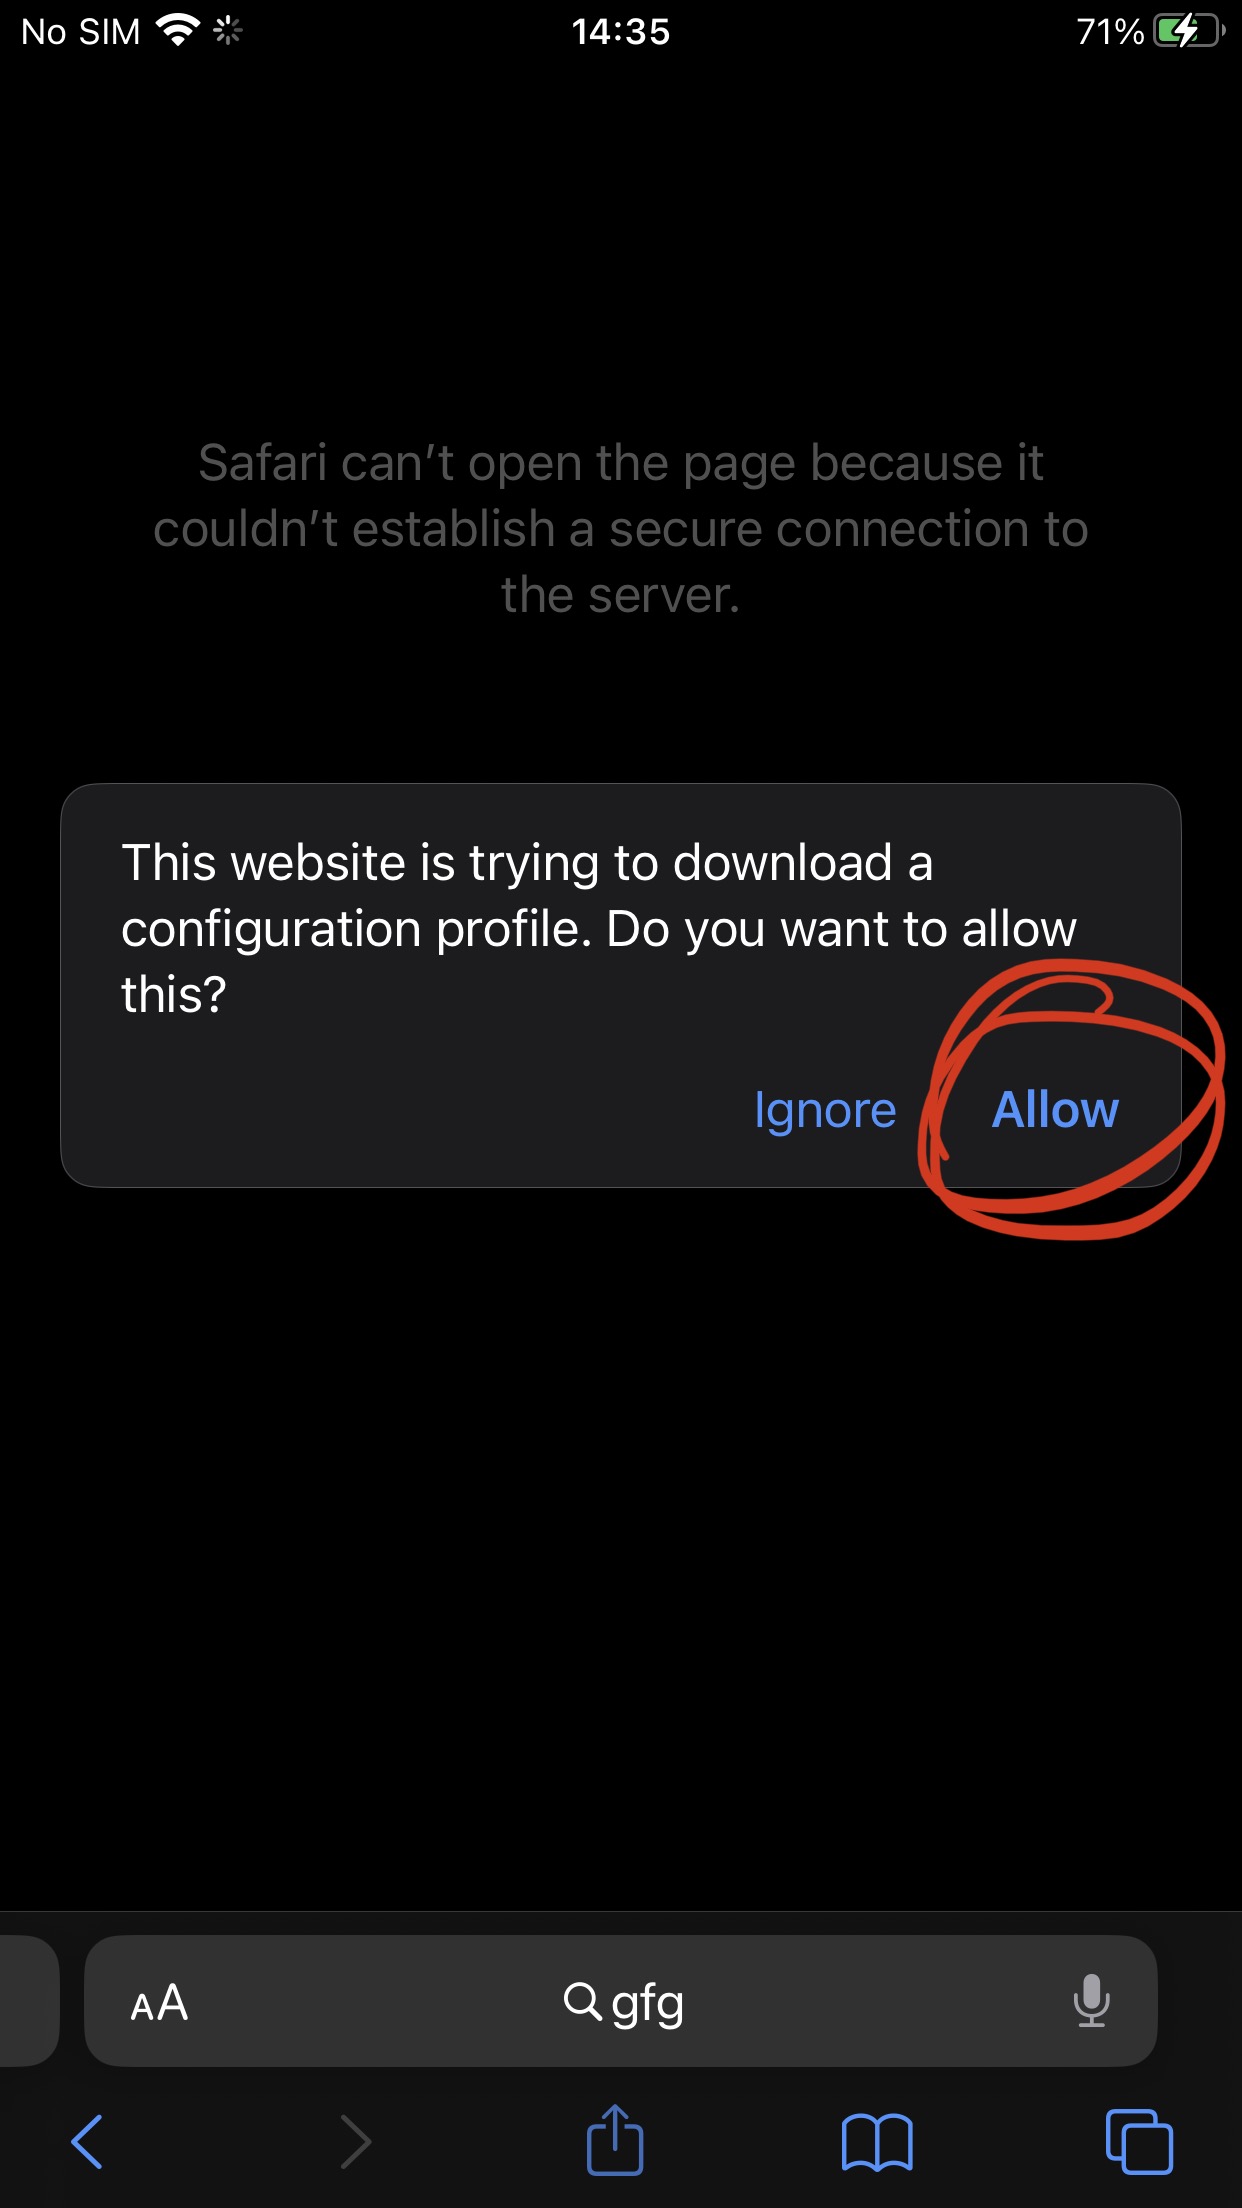
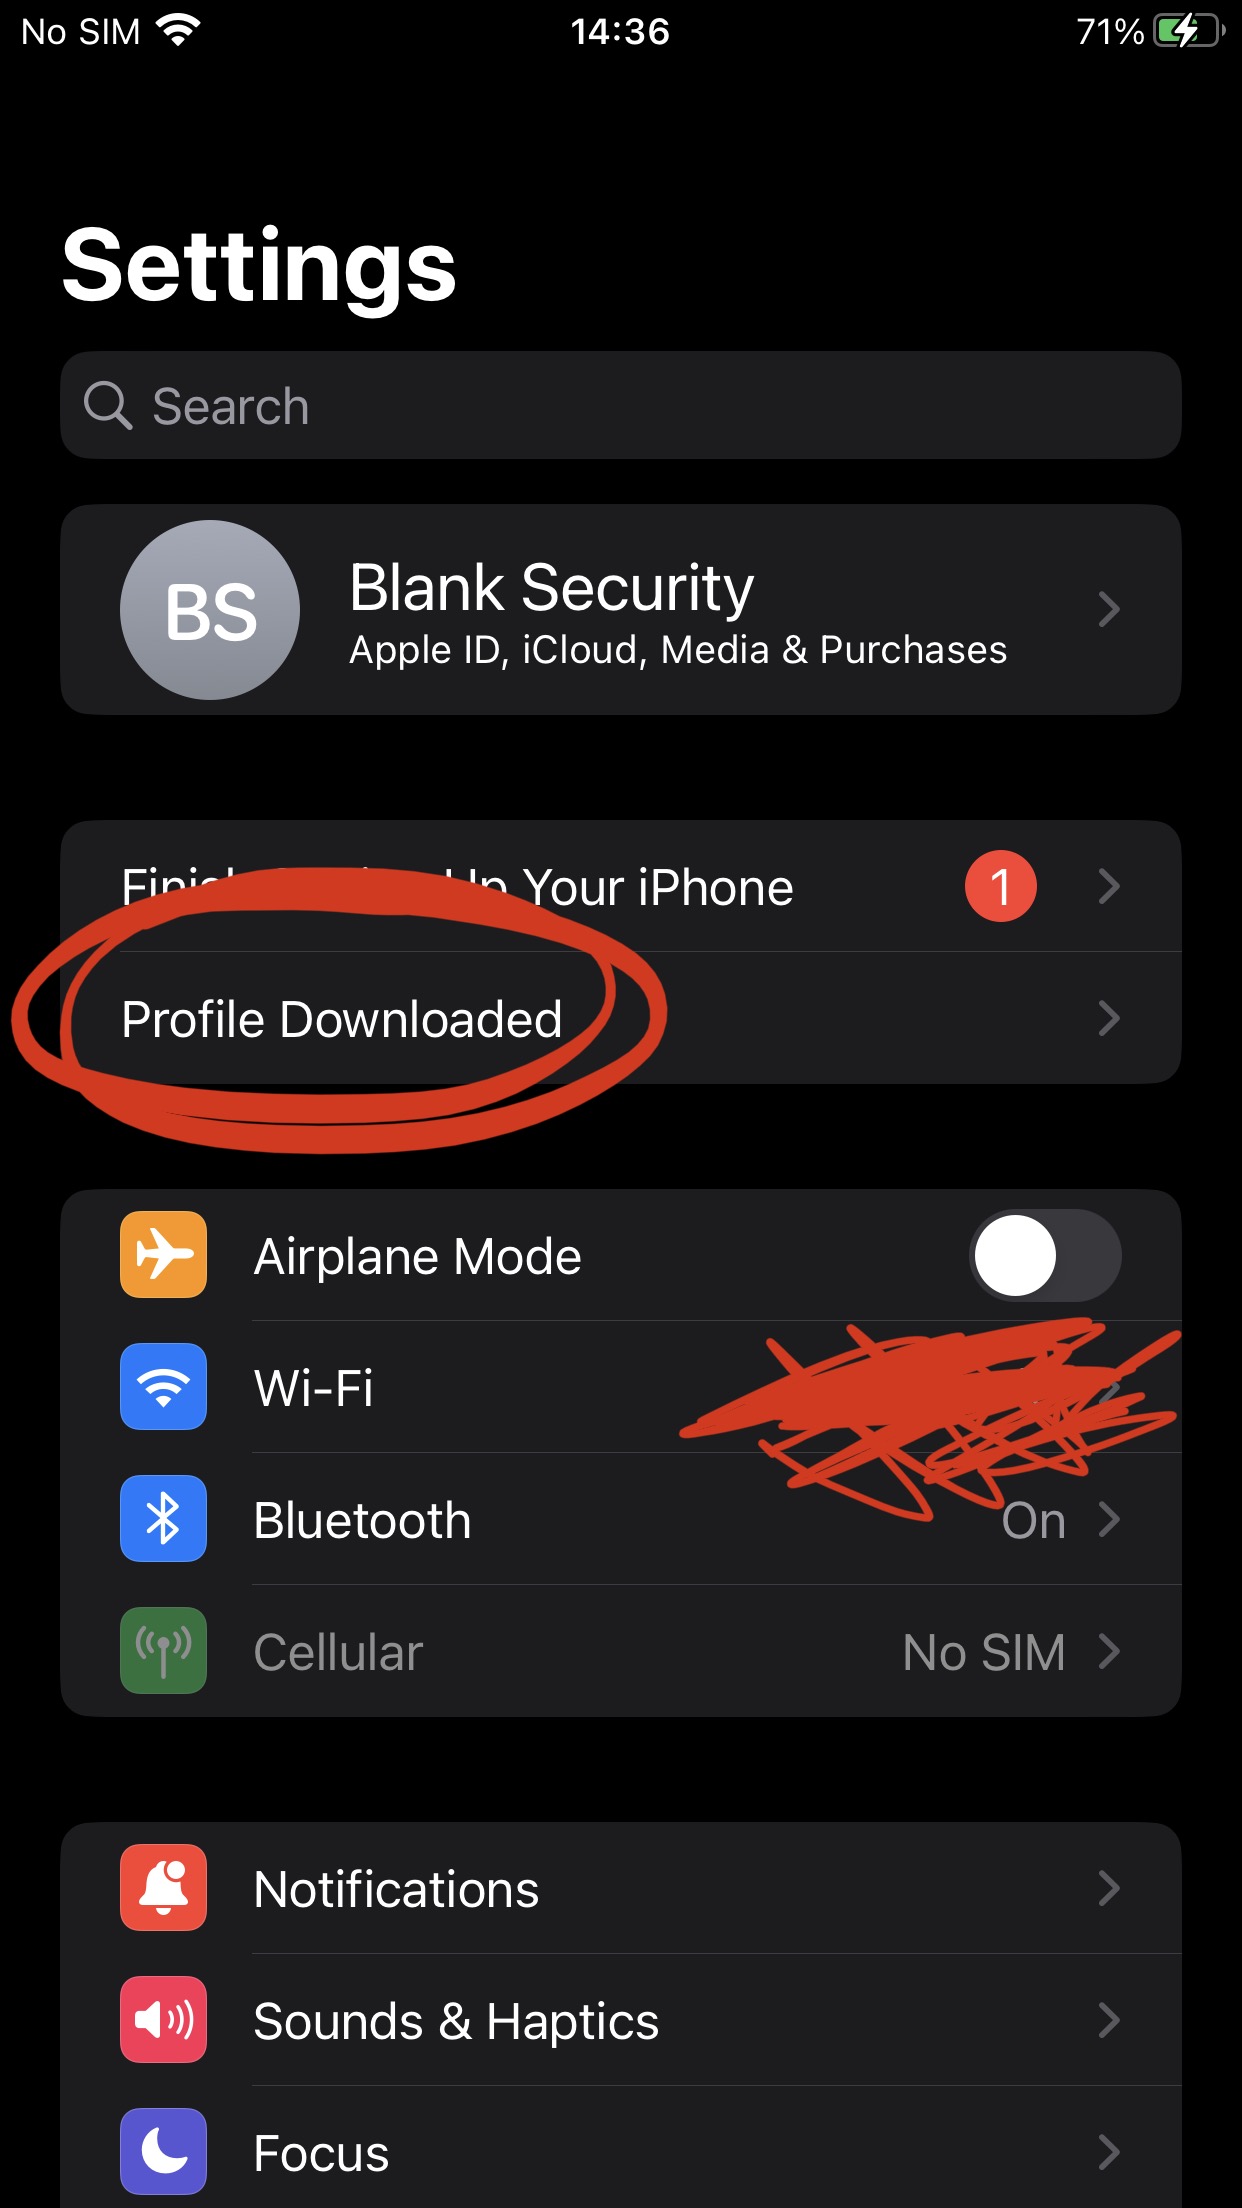
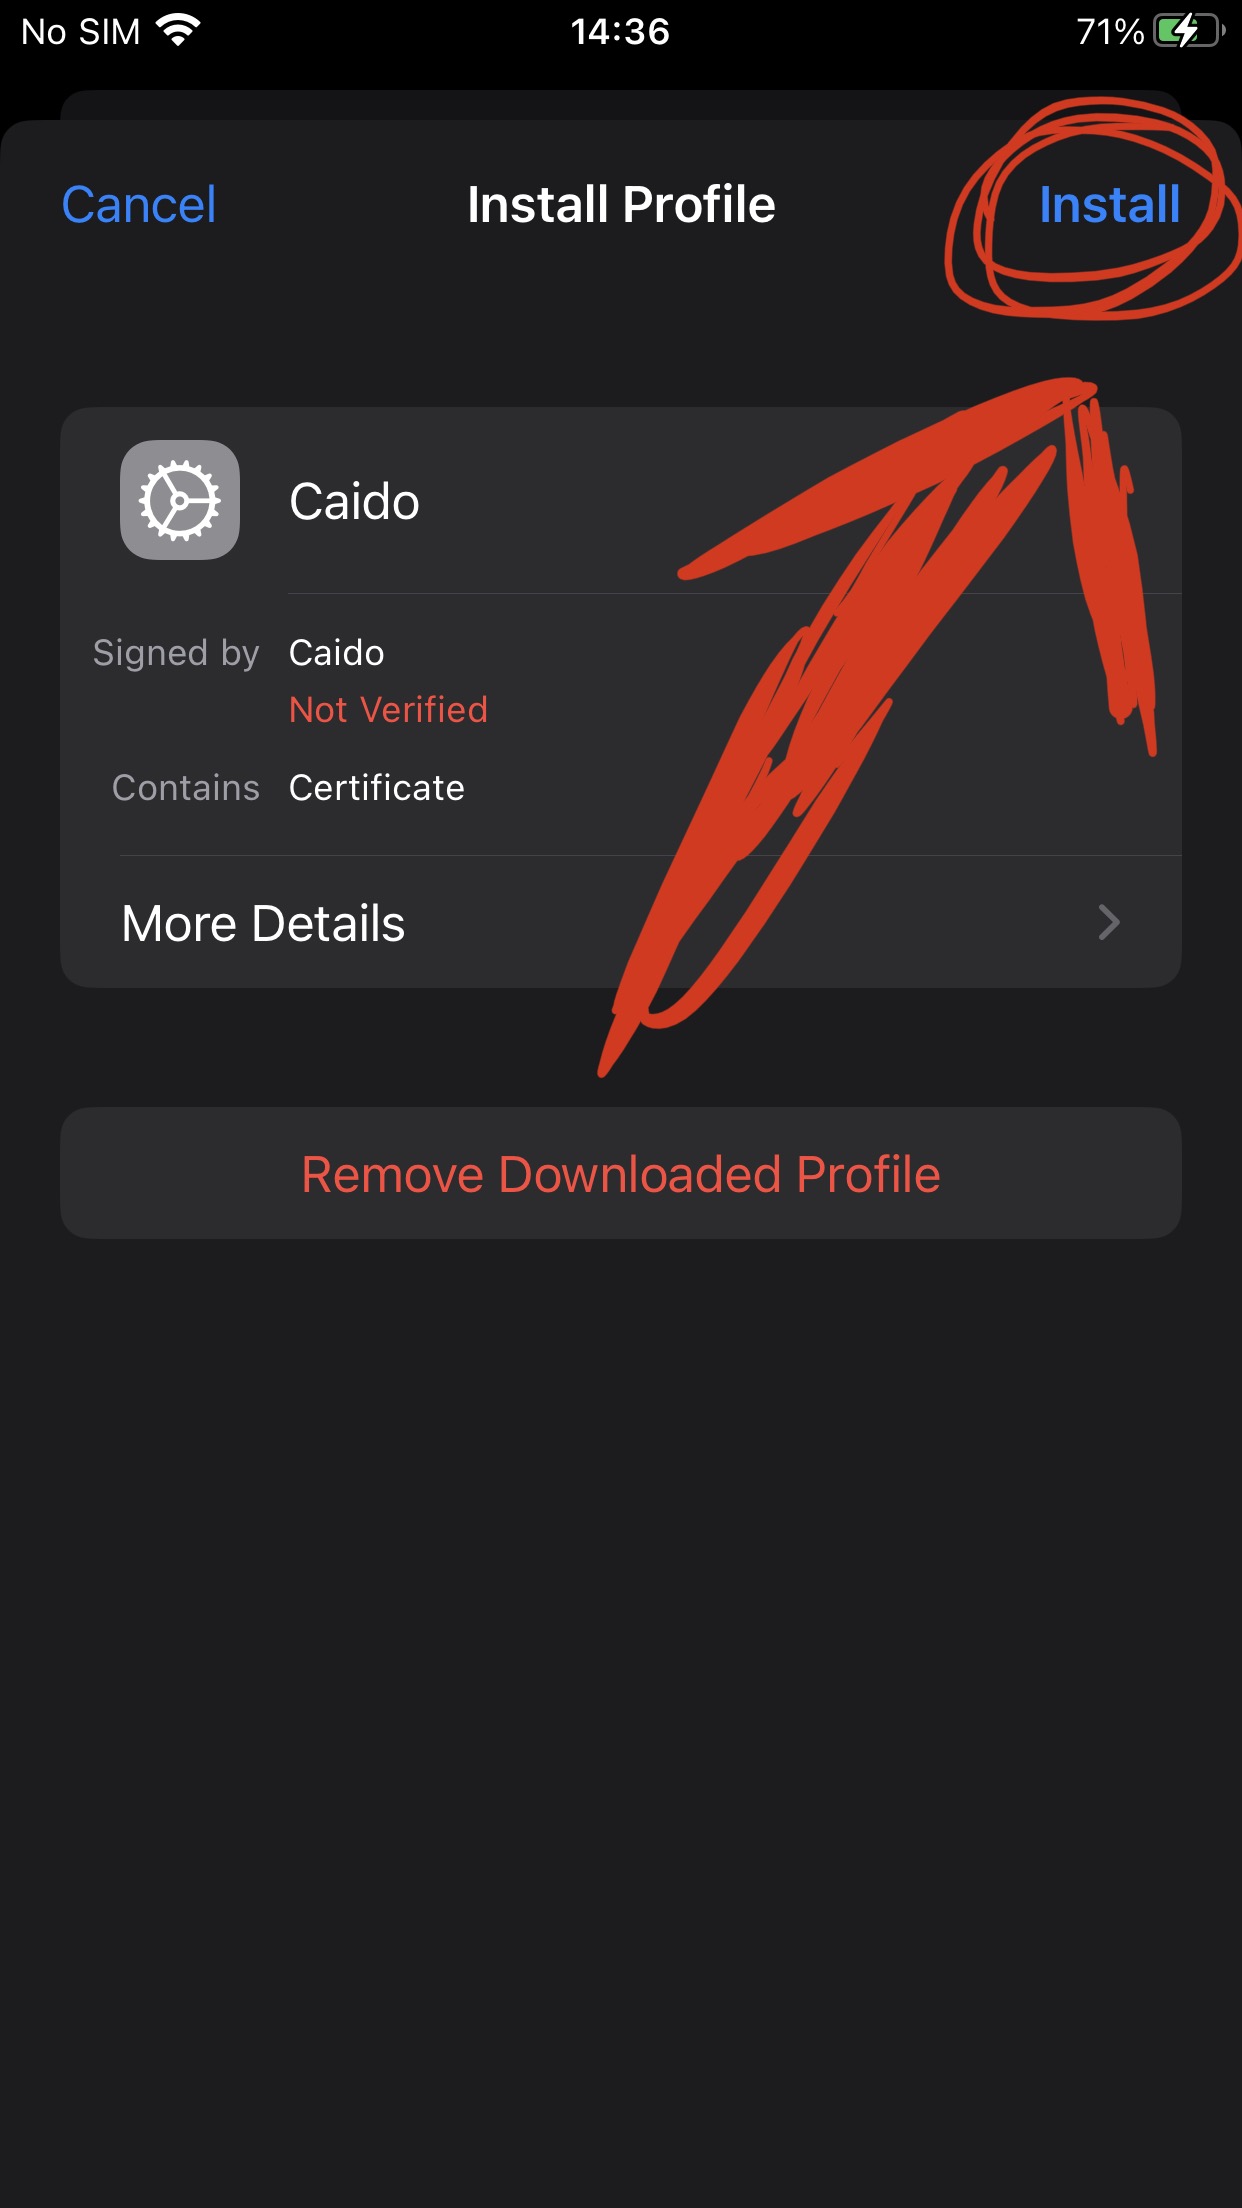
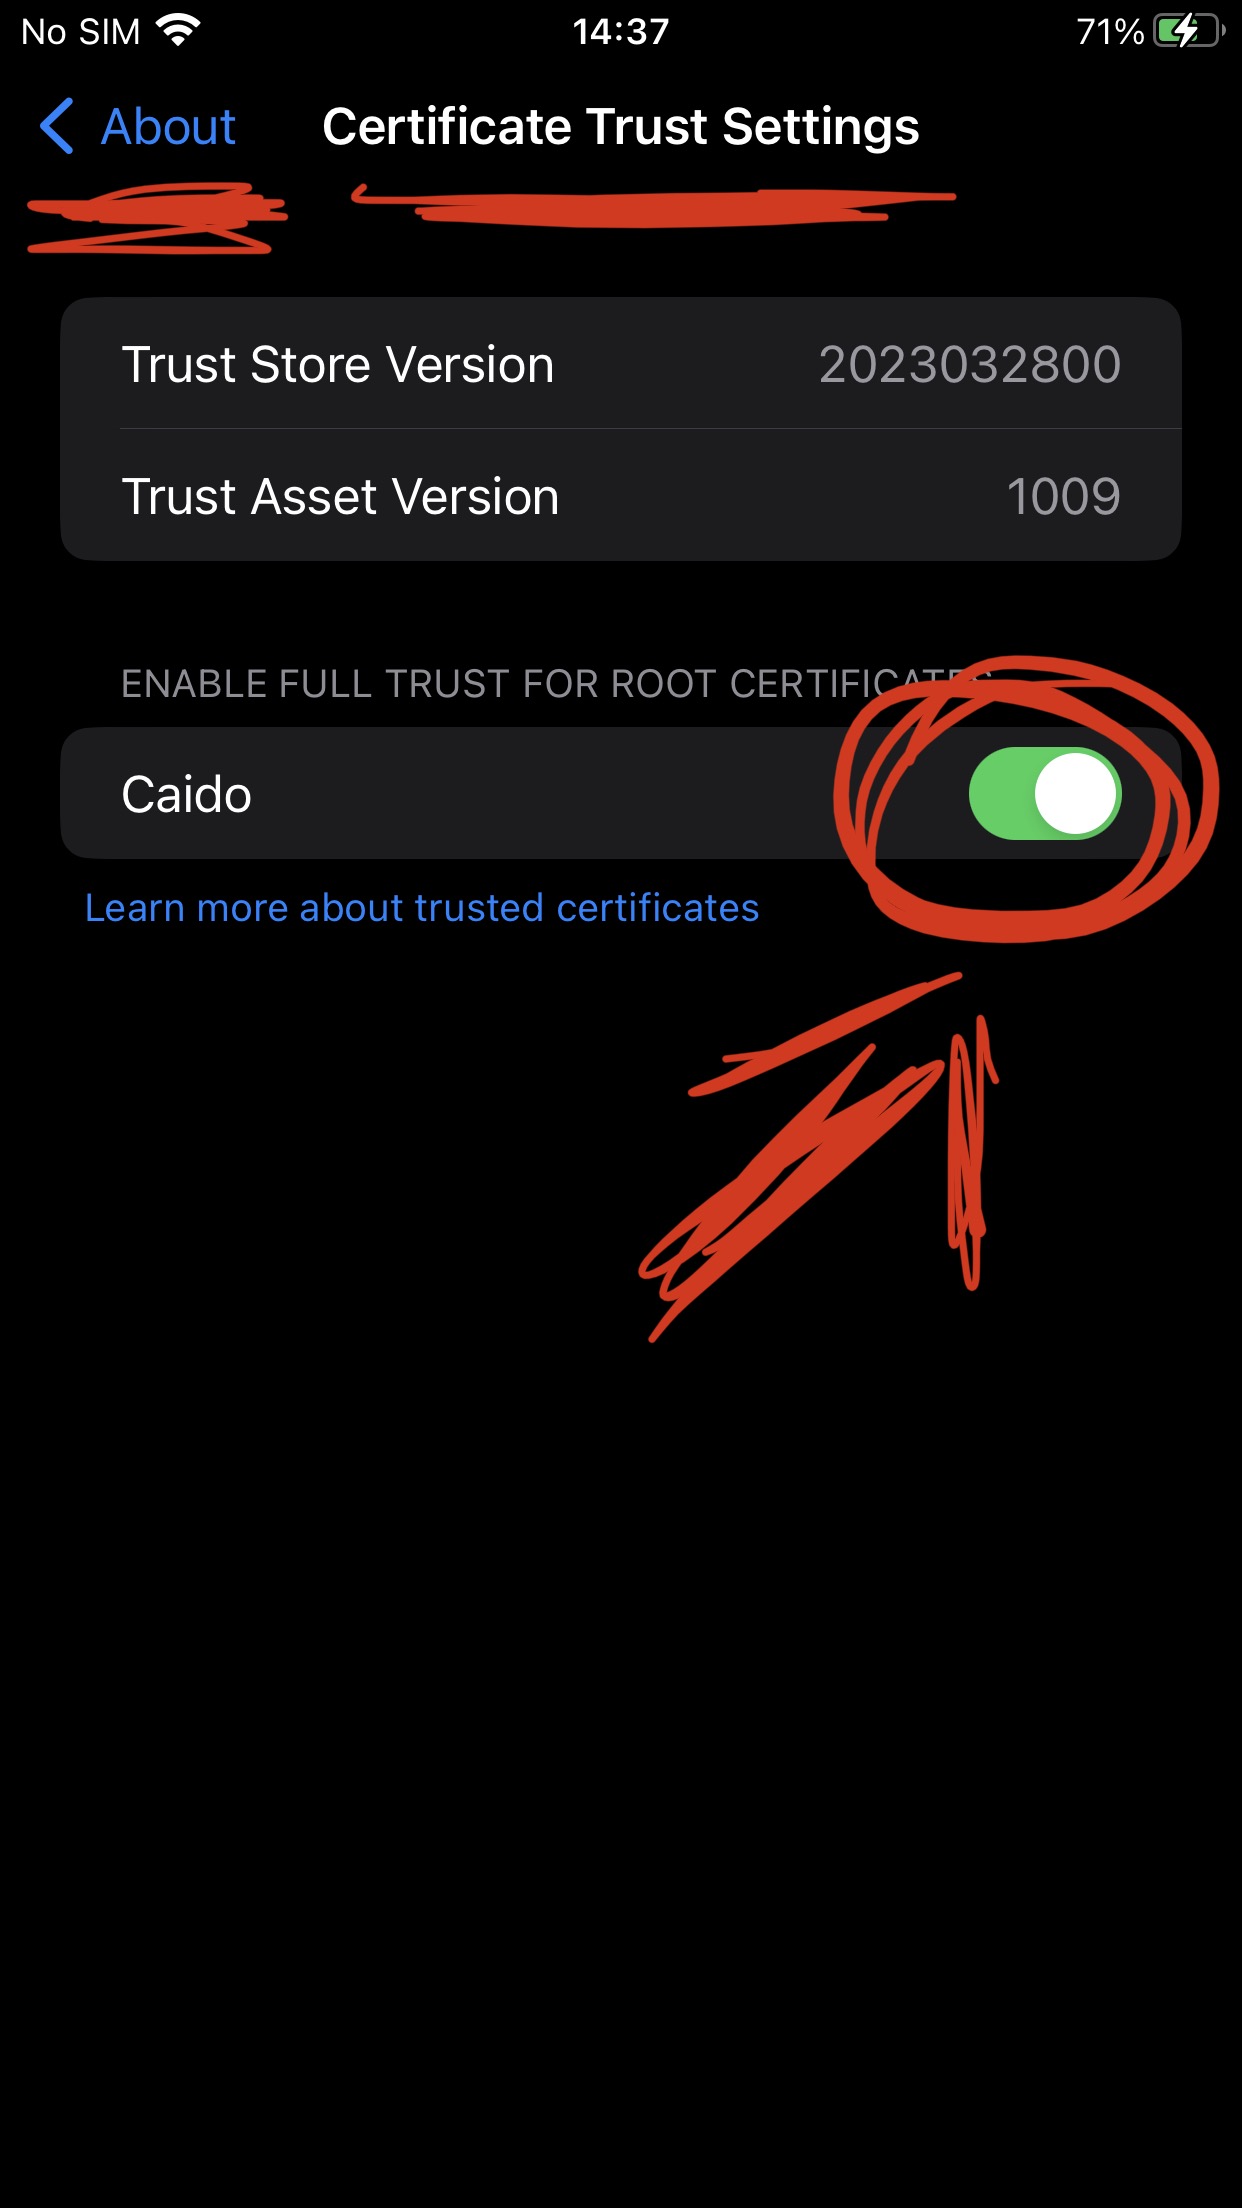
- Setting Up Caido
- Configuring the iOS Device
- Intercepting Traffic
- Common Use Cases
Install Caido: caido.io/download
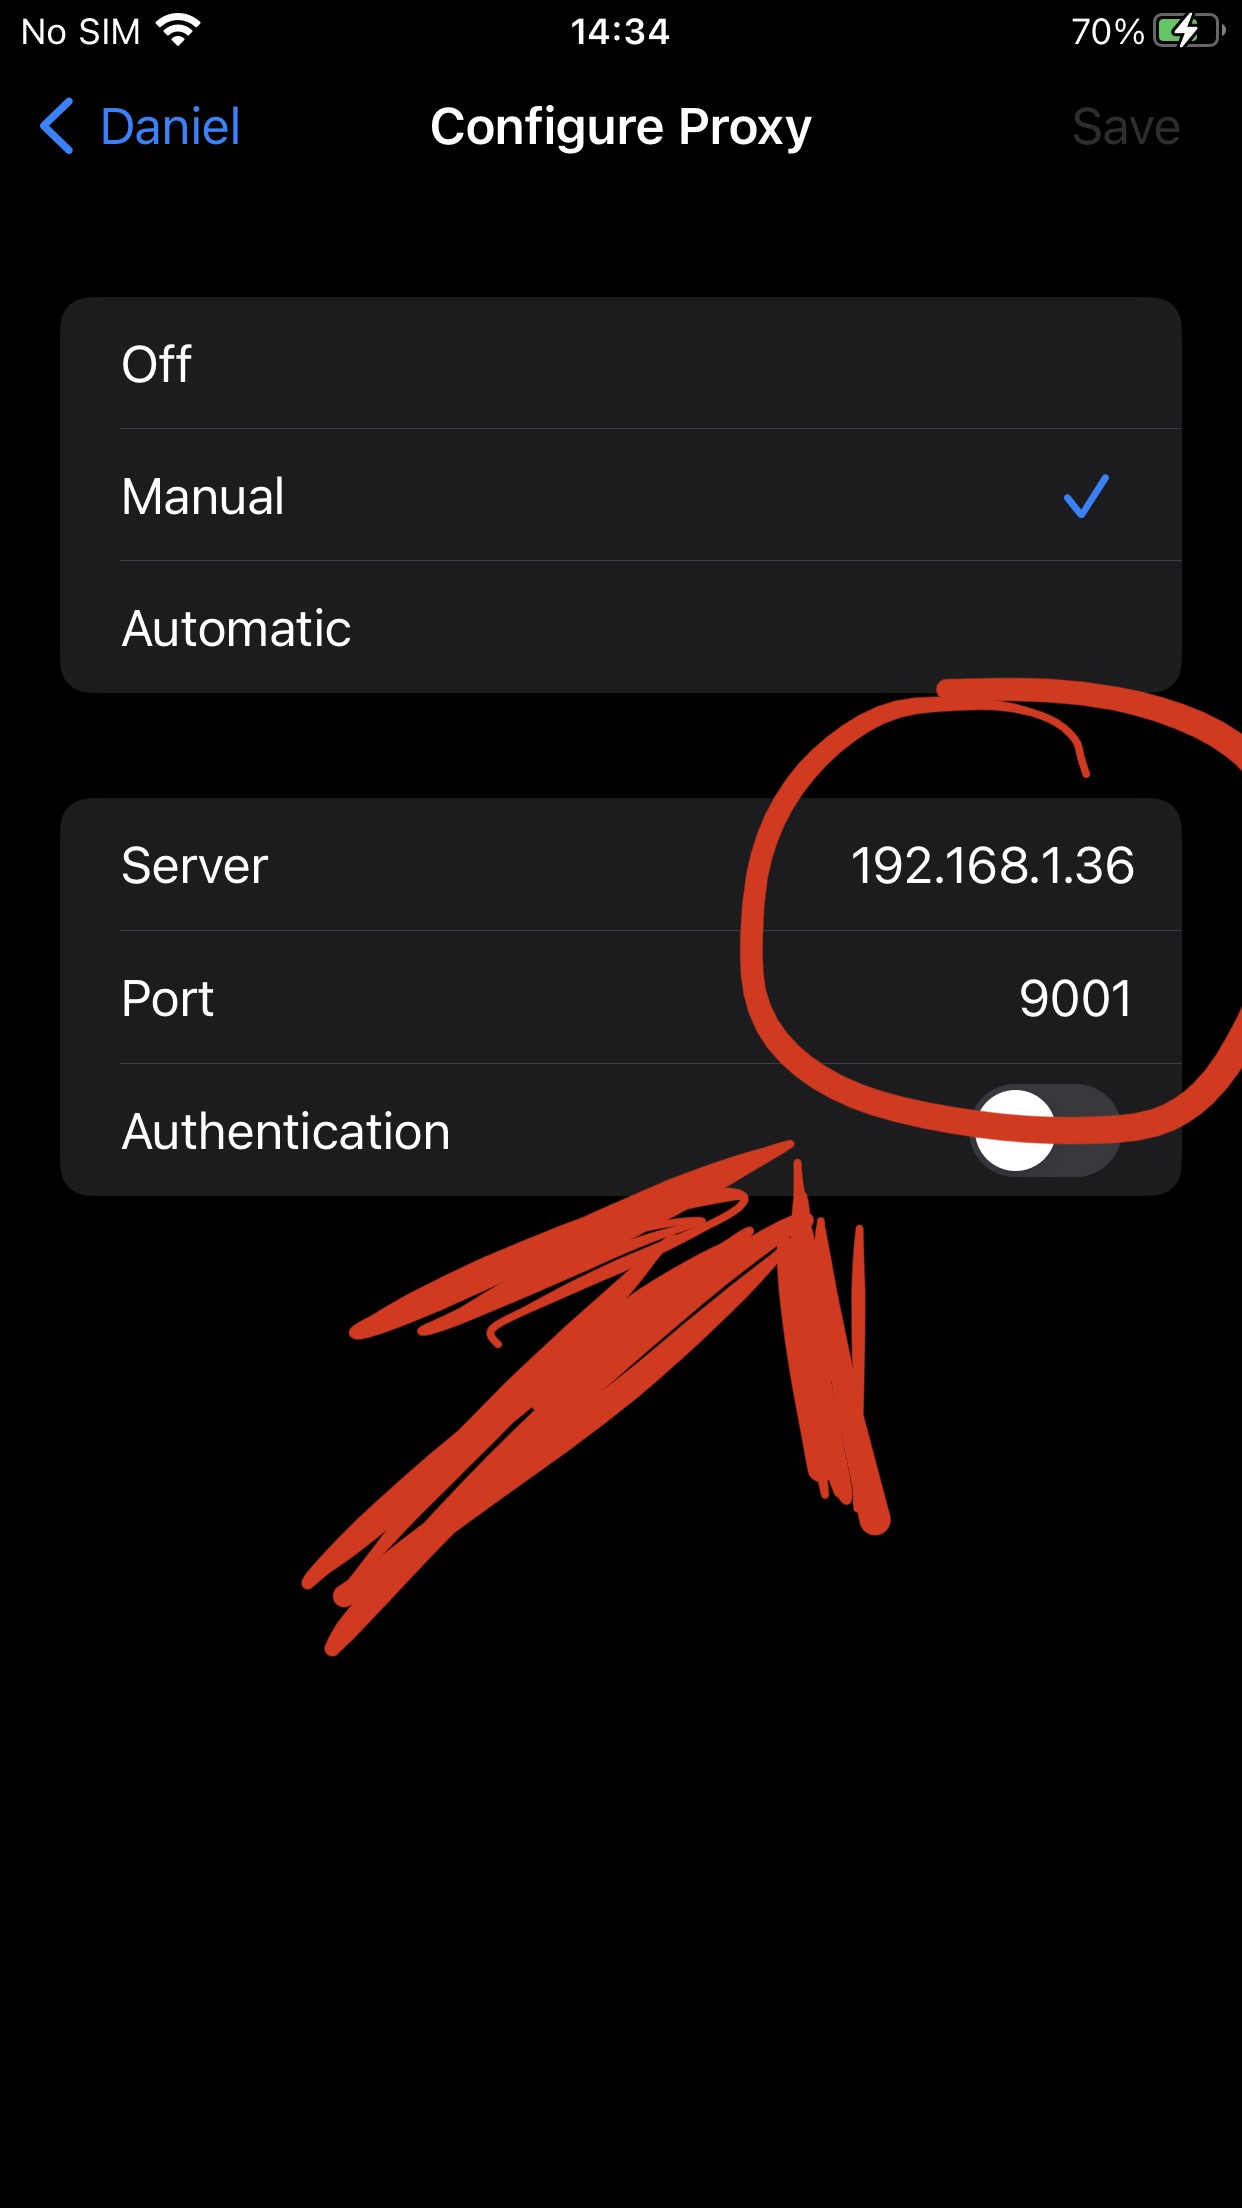
Setup your PC IP on instances page
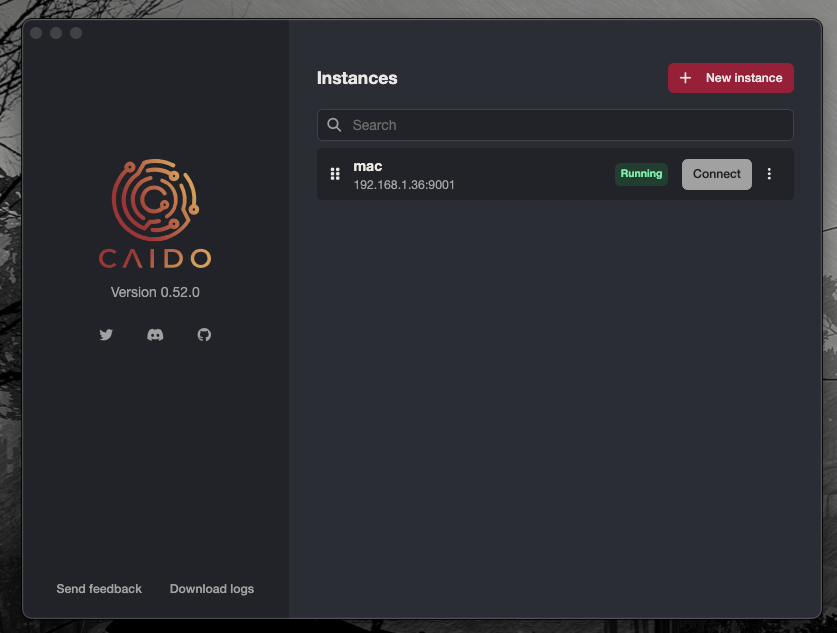
Use the same IP used on caido, to configure iPhone Proxy
Dynamic Instrumentation
- Setting Up Frida github-link
- Connecting to the iOS Device
- Injecting Scripts
- Advanced Features
- Security Testing With Frida
Host Installation
Install Frida client via python:
pipx install frida-tools
Server installation on iOS
- Jailbreak is needed
- Via package manager wiki
- Manual Installation (.deb) frida/releases

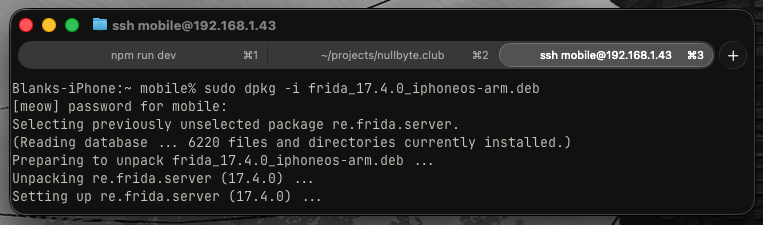
Manual Installation
On Host
scp frida_17.4.0_iphoneos-arm.deb mobile@192.168.1.43:/var/mobile
On iPhone
cd /var/mobile
dpkg -i frida*.deb
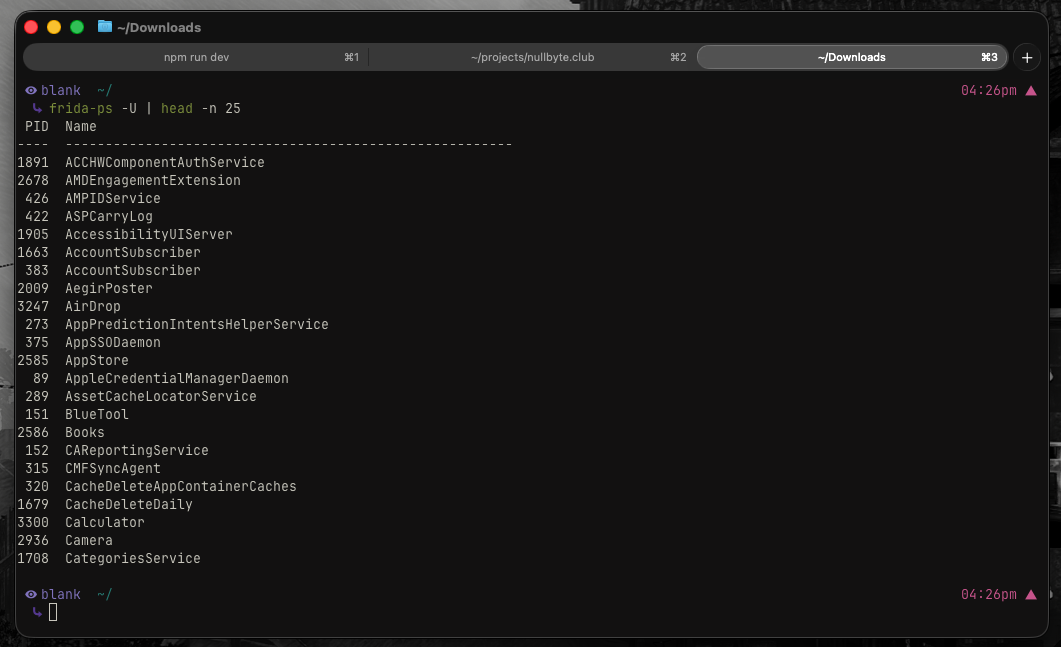
 Testing
Objection and MobSF
Installing Objection:
On Host:
pipx install objection
Installing MobSF
docker pull opensecurity/mobile-security-framework-mobsf:latest
docker run -it --rm -p 8000:8000 opensecurity/mobile-security-framework-mobsf:latest

# Default username and password: mobsf/mobsf
Static Instrumentation
Extracting the IPA File
AppStore
- ipatool (maybe) link
- Apple Configurator 2 Copy from device (jailbroken device)
- Use SSH
- Use DumpDecrypter
- Use Frida-iOS-Dump